You can easily create Custom Data Fields in HubSpot using our mapping User Interface. To proceed, follow these steps:
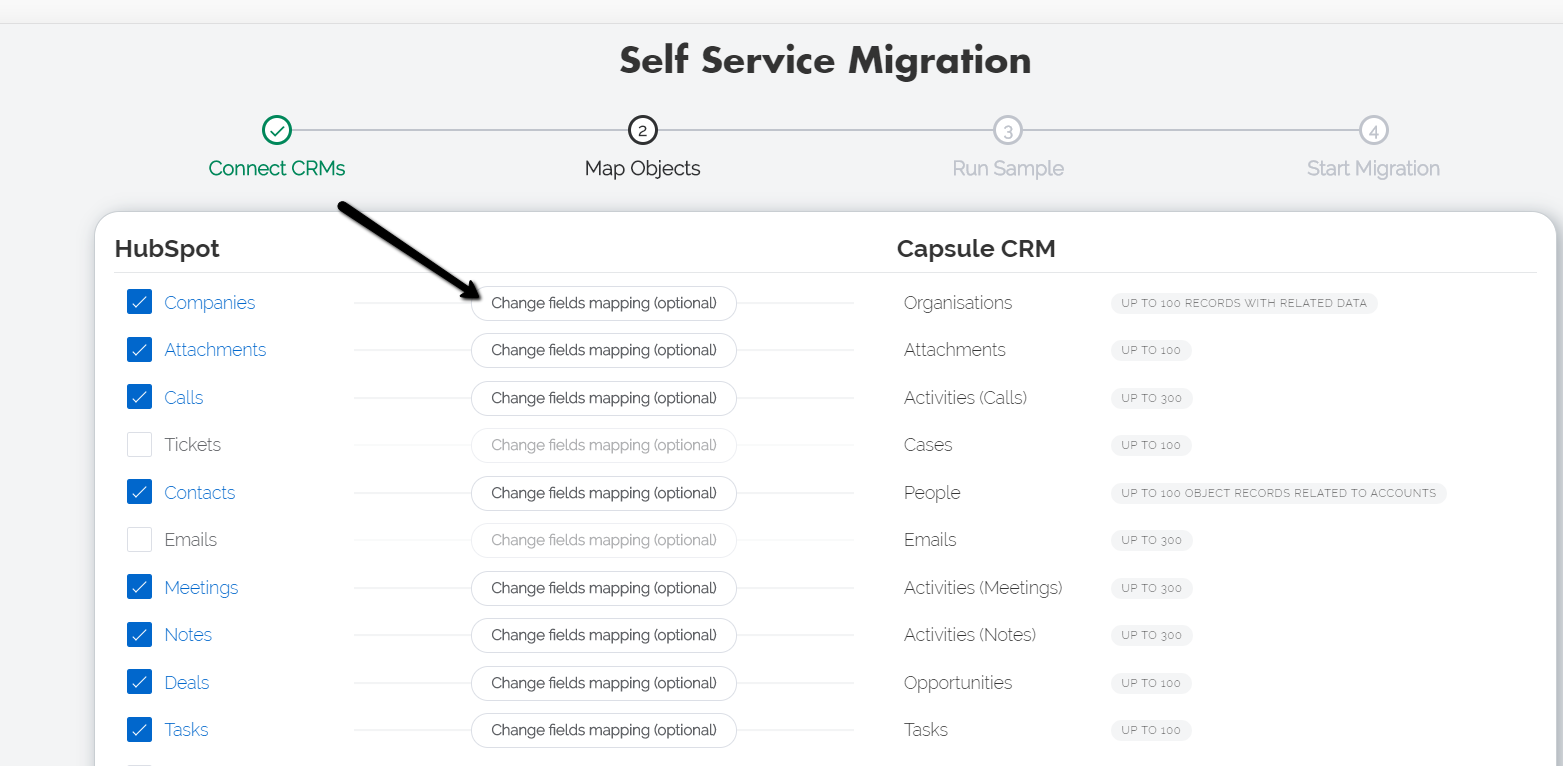
- Go to objects mapping page by clicking Change fields mapping
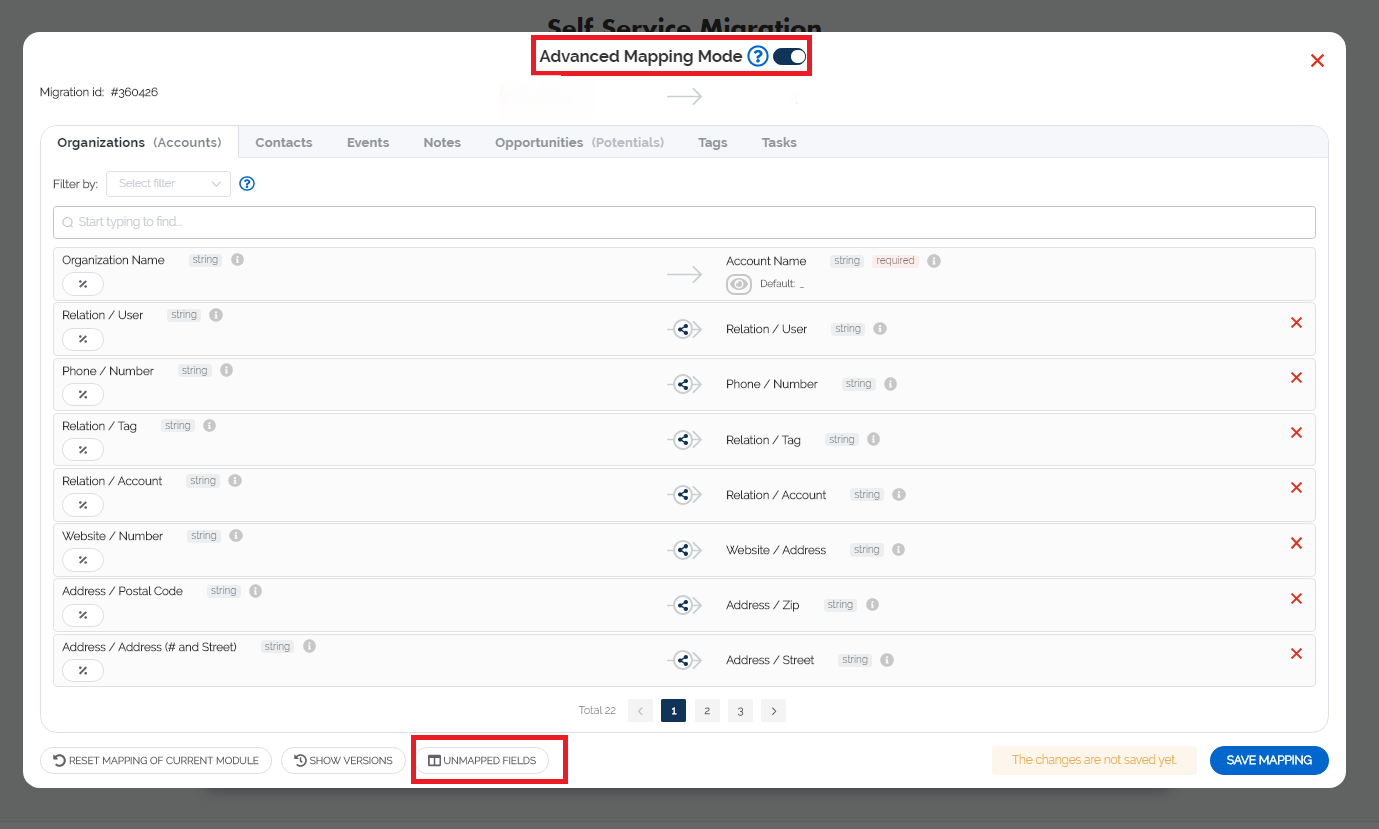
- On the mapping page, click Unmapped Fields, choosing Advanced Mapping Mode.
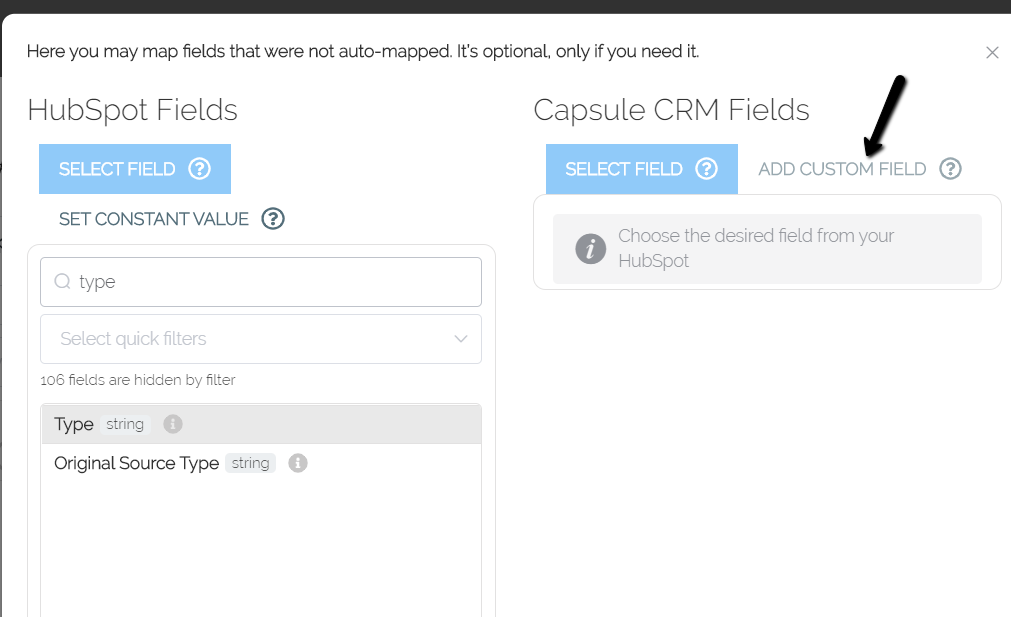
- You will open a window to map fields that weren’t automated. On the target CRM side, click Add custom field:
- Choose a field type on your target CRM from the dropdown list. The custom field will appear in the list of HubSpot so you can match it.
Please note that this option is available only for Accounts, Cases, Contacts, and Opportunities.
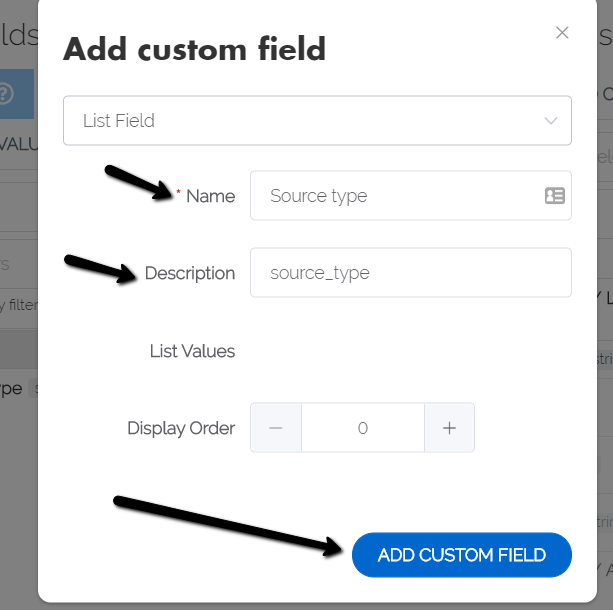
- Set the desired field name and description, and click Add custom field:
Congratulations, you have successfully created custom fields 👍
| To create custom fields in HubSpot, here's a step-by-step guide:
- Log in to your HubSpot account.
- Go to the "Settings" section by clicking on the gear icon in the top navigation menu.
- From the dropdown menu, select "Properties" under the "Objects" category to access the properties settings page.
- On the left-hand side, you'll find various categories like "Contacts," "Companies," and "Deals." Choose the category where you want to add the custom field.
- Inside the selected category, you'll see a list of default properties (fields) already available. To create a new custom field, click on the "Create Property" button at the top right corner.
- In the property creation form, provide the following details:
- Property Type: Select the appropriate type for your custom field, such as single-line text, multi-line text, date, or number.
- Display Name: Enter the desired name for your custom field. This is how it will be displayed in HubSpot.
- Internal Name: HubSpot will automatically generate an internal name based on the display name, but you can modify it if necessary.
- Group: Choose an existing group or create a new one to organize your custom fields. Grouping helps with easy navigation and management.
- Field Options: Depending on the property type, you may have additional options like default value, field length, currency, etc. Fill in the relevant details.
- Advanced Options: Specify whether the field is required, searchable, visible on forms, etc., based on your requirements.
-
After entering the required information, save the custom field by selecting the "Create" or "Save" button.
-
The newly created custom field will now be visible in the properties list under the selected category.
-
If necessary, you can repeat these steps to create additional custom fields in different categories. By following these instructions, you can effortlessly generate custom fields in HubSpot. These fields can then be utilized in HubSpot forms, workflows, reports, and other areas to capture and store relevant data that aligns with your specific business needs.
|