Before performing the migration from Salesforce, it’s recommended to make sure that authorized user has access to all objects data. To do that, follow the next steps:
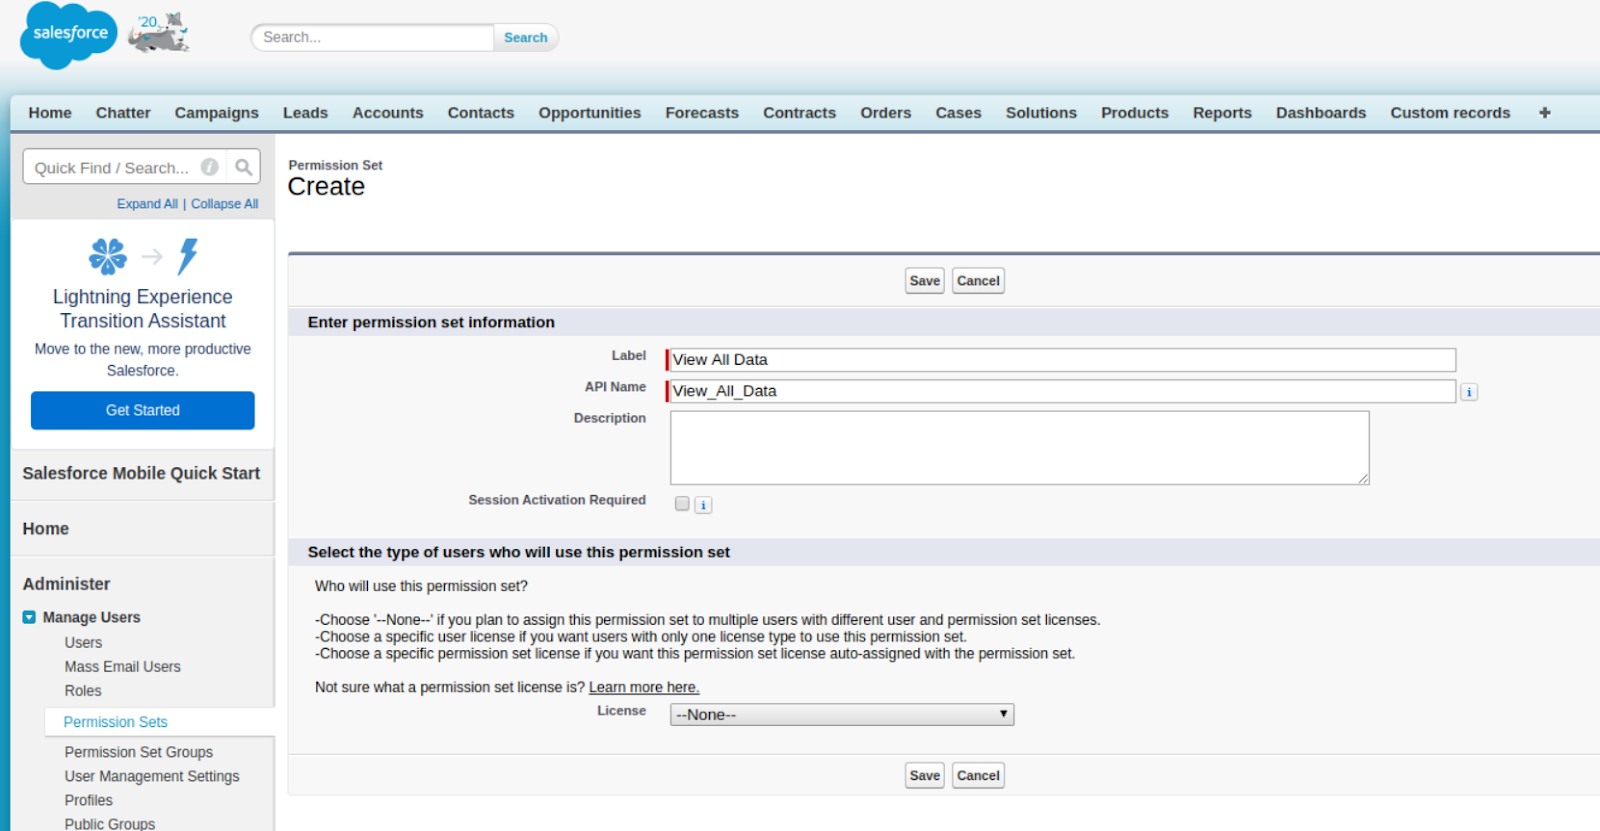
- Sign into your Salesforce and go to ‘Setup’ in the upper-right corner. Then, press ‘Manage Users’ and ‘Permission Sets’ on the left sidebar and click on ‘New’ after that.

2. Create the permission set by entering the required information and press ‘Save.’
NOTE: keep License field value as None, this will allow you to make required changes further.
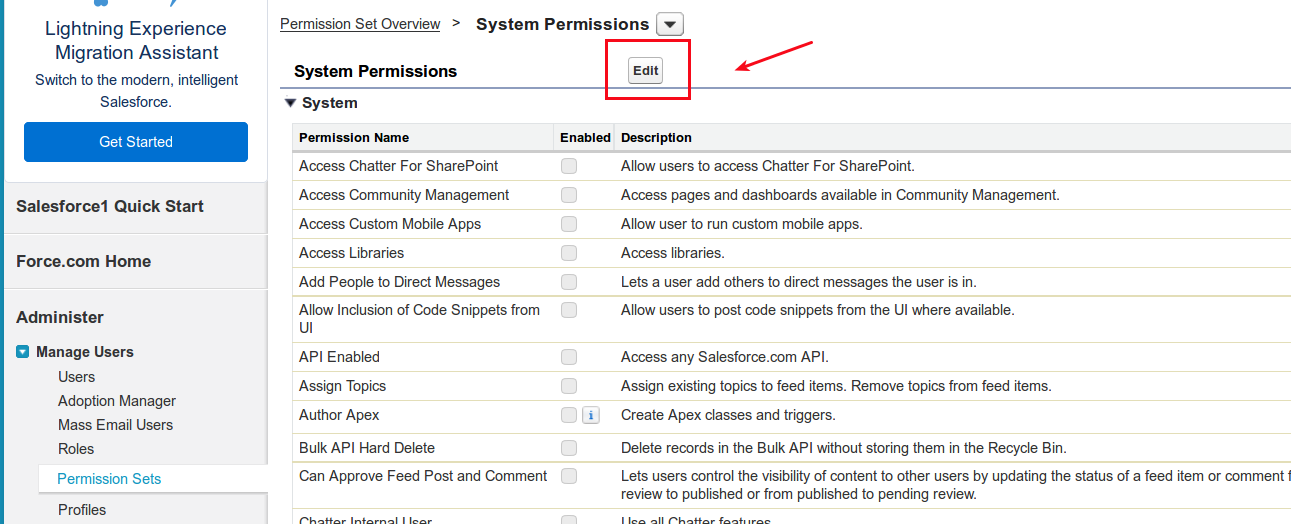
3. Now, go to ‘System permissions,’ and
.png)
click on ‘Edit’ on top of the System Permissions list.
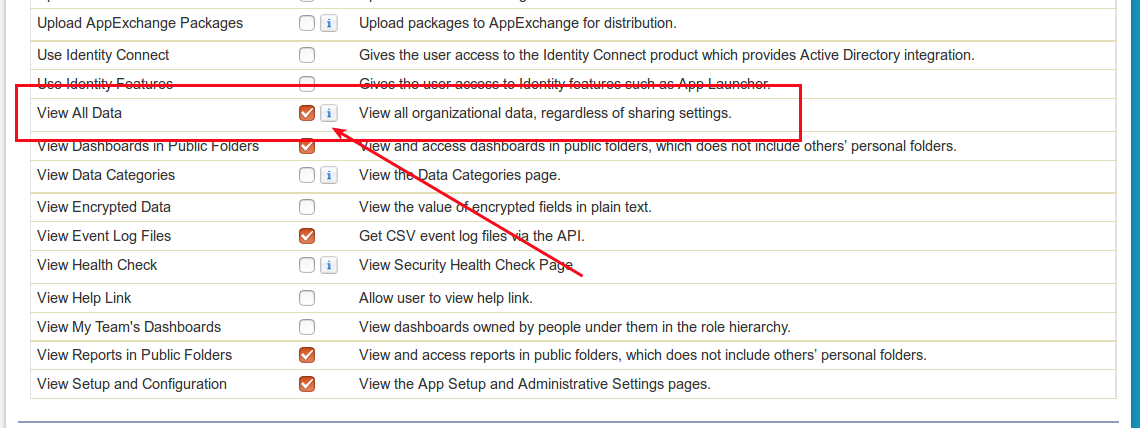
4. The next step is finding the permission set named ‘View All Data’ and ticking the box next to it.
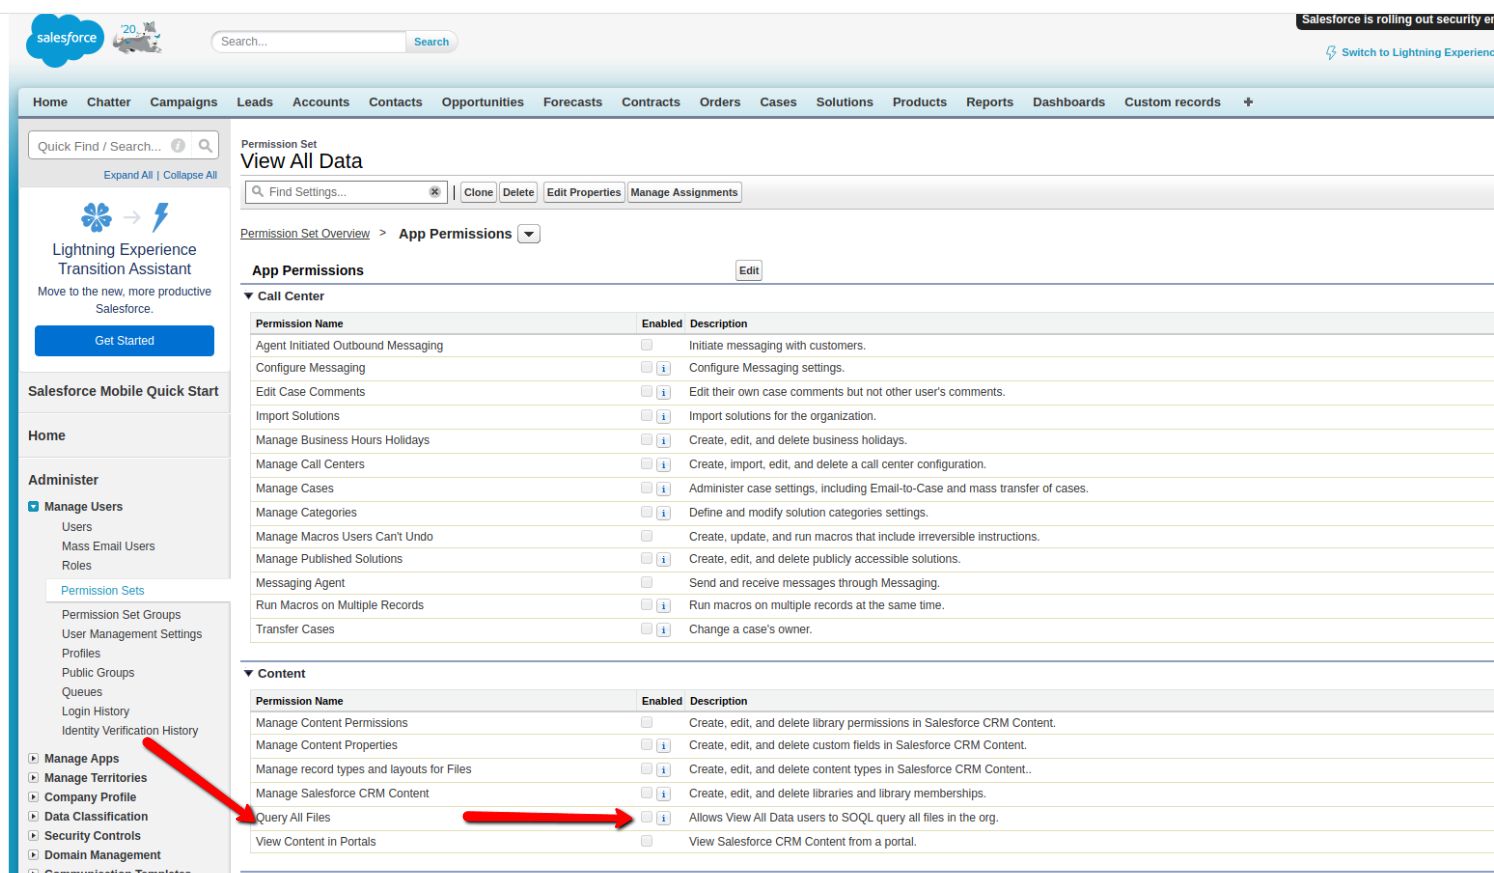
5. Go to App Permission → Content → Query All Files (check the option Allows View All Data users to SOQL)
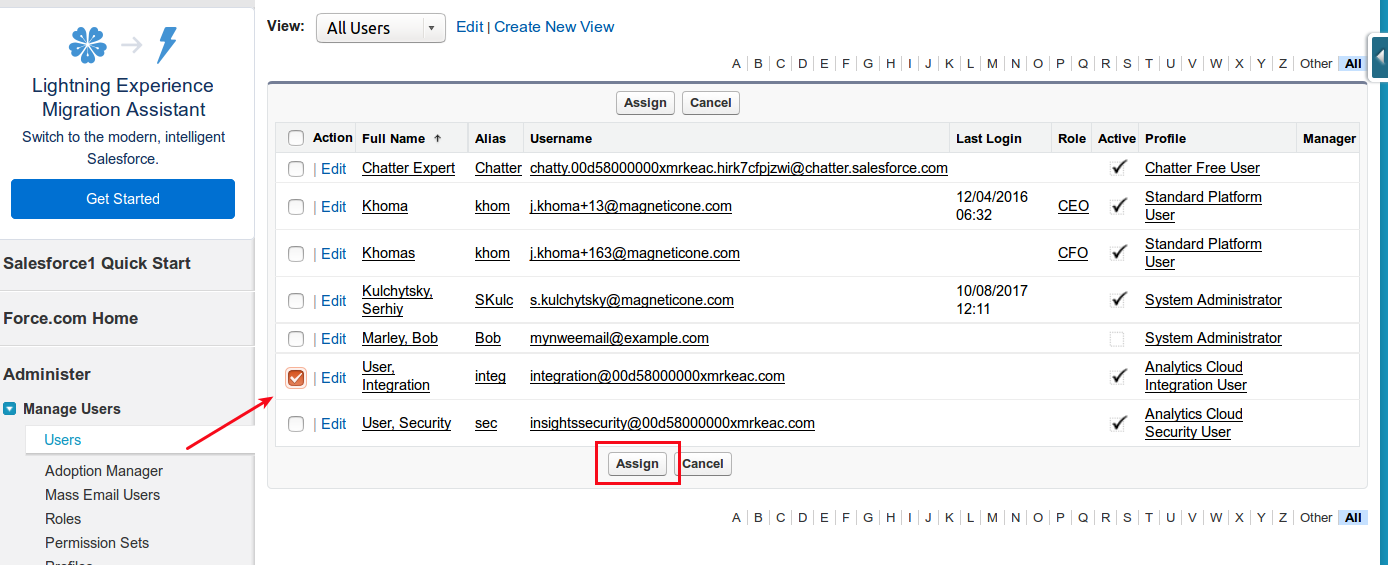
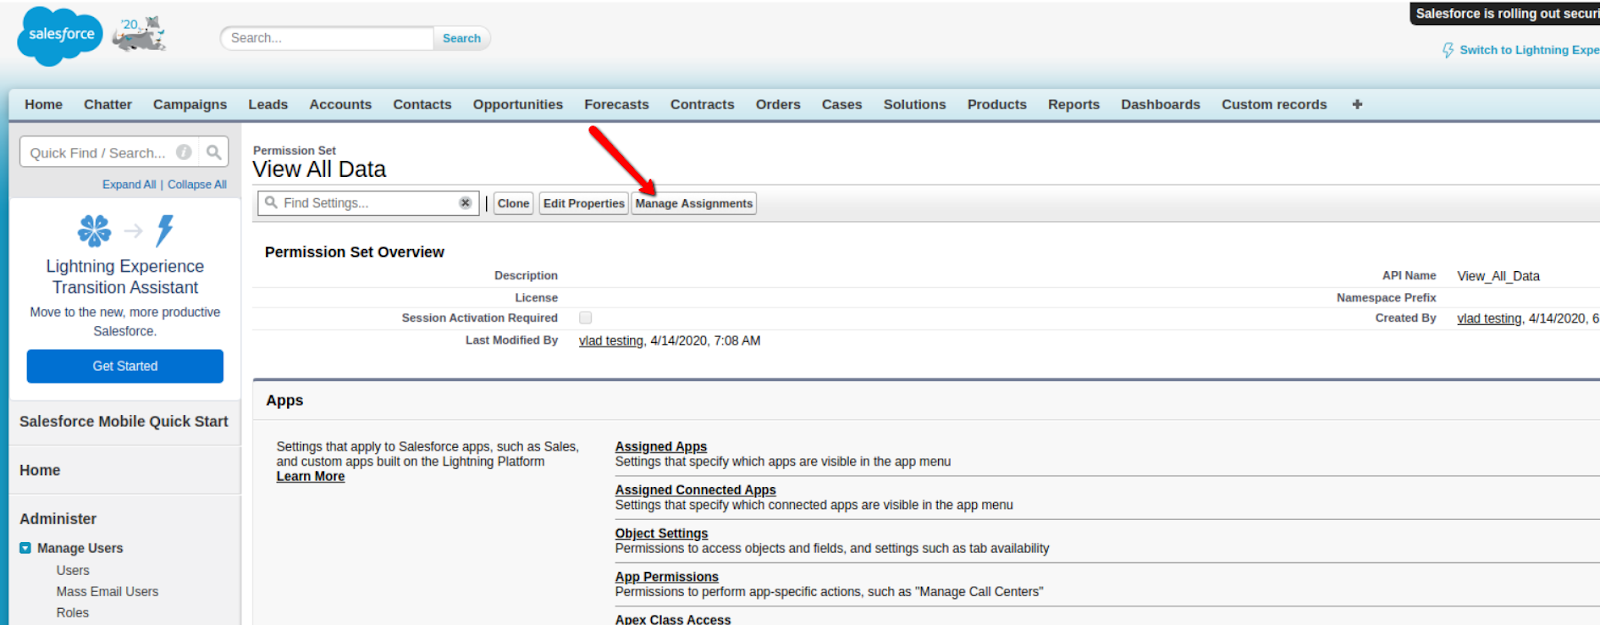
6. Then, come back to on top of the page to press ‘Manage Assignments,’ and
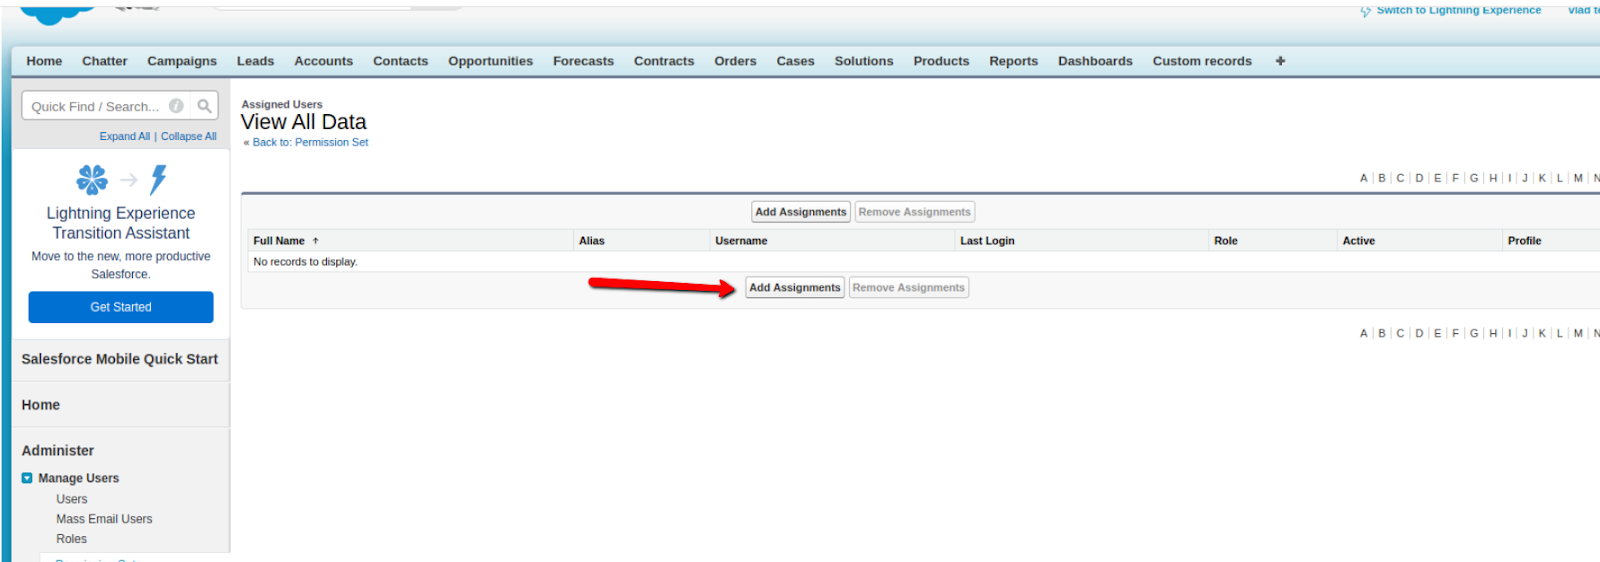
‘Add Assignment’ after that.
7. Finally, choose the user for allowing him/her to access all Salesforce data, click ‘Assign’ and ‘Done.’ At this point, all Salesforce objects records can be viewed by the authorized user.