To Migrate “Create date” Field to Salesforce, it is necessary to Enable ‘Create Audit Fields’ within the platform.
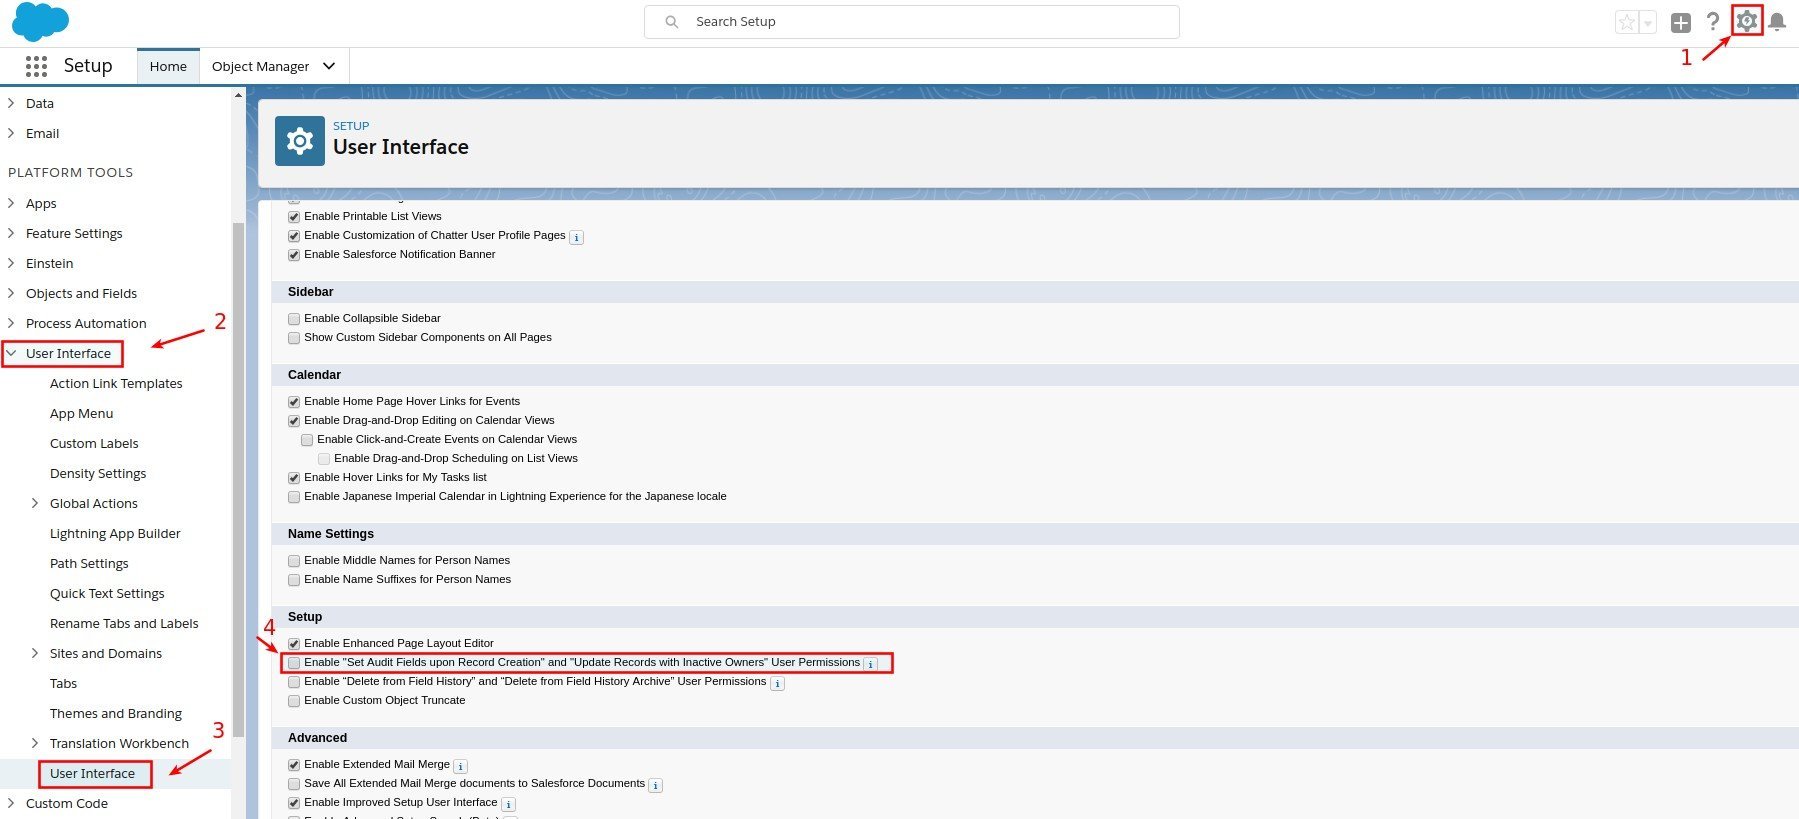
See how to do that in Lightning Experience:
- Click Setup -> Setup (from drop-down).
- Select User Interface
- Push User Interface
- Choose “Enable Set Audit Fields upon Record Creation and Update Records with Inactive Owners User Permissions.”
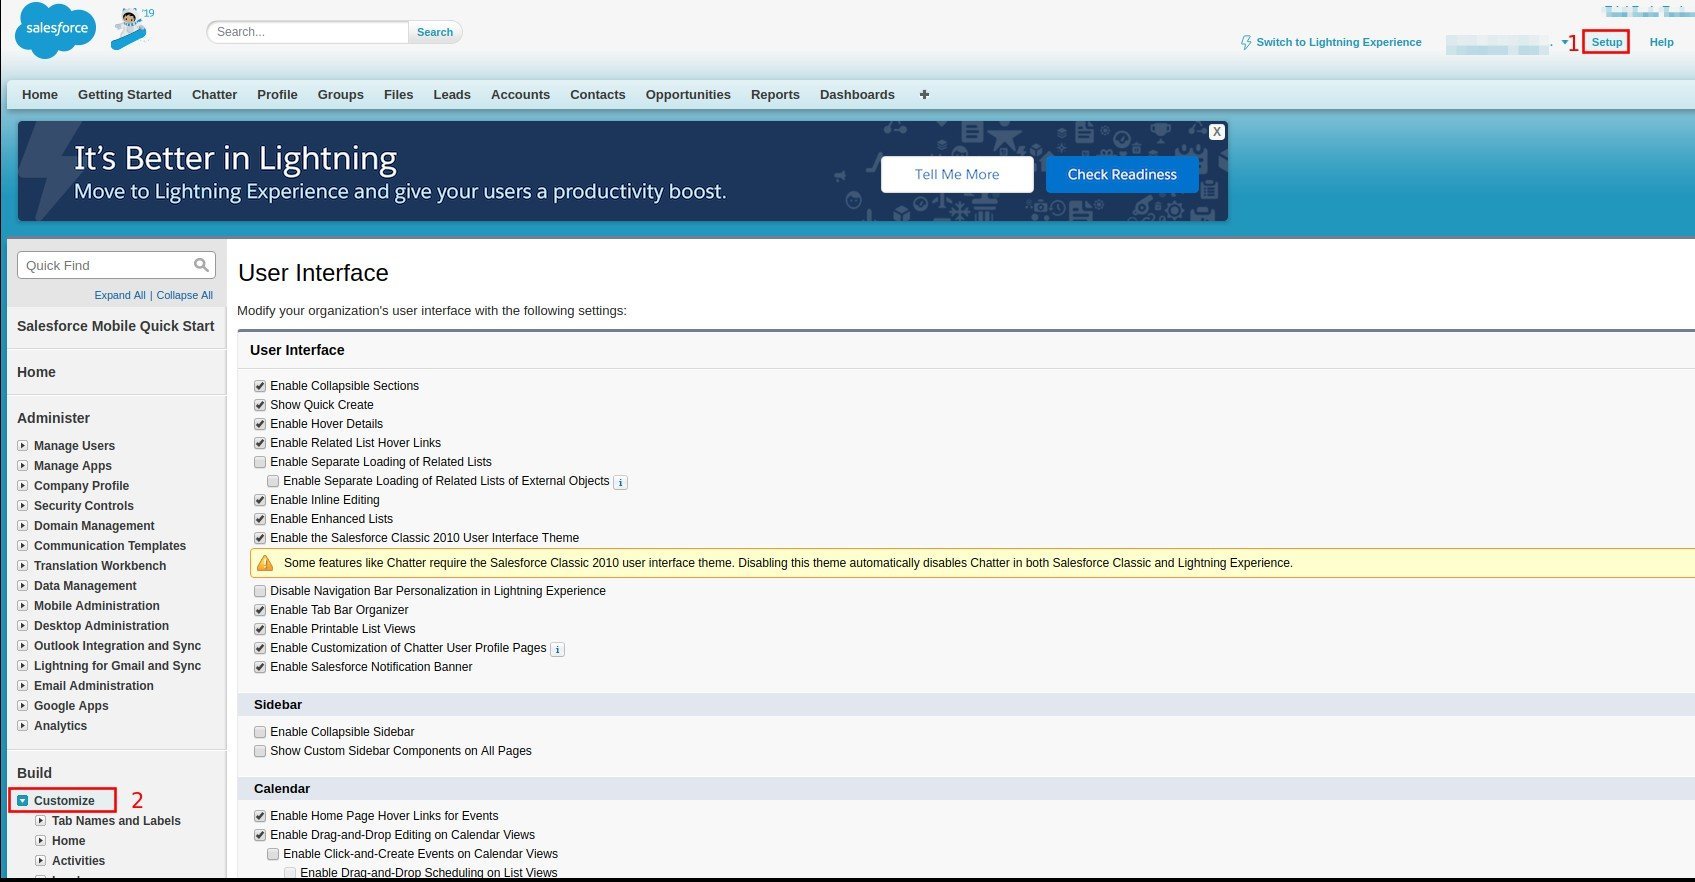
How to Enable ‘Create Audit Fields’ in Salesforce Classic:
- Click Setup
- Select Customize
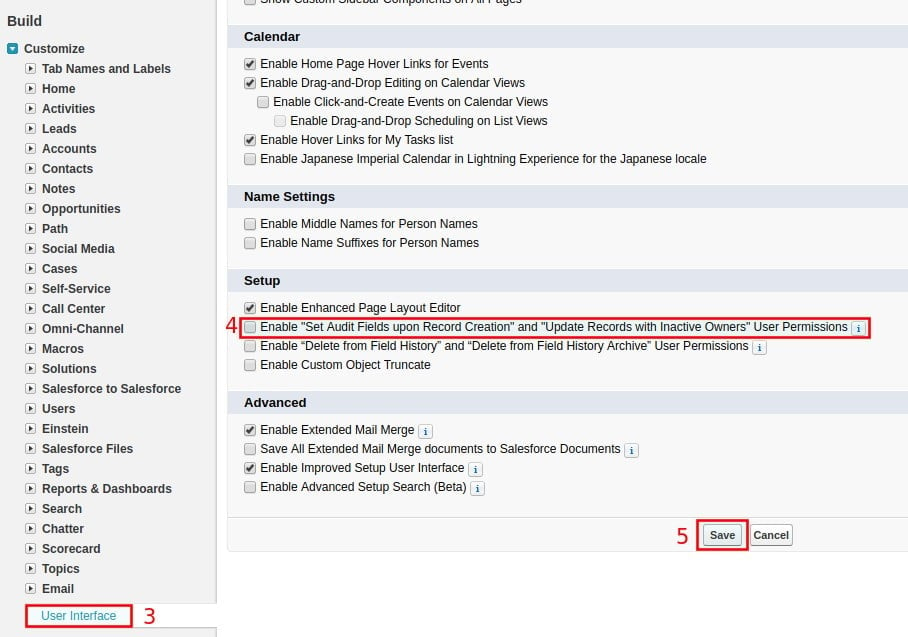
- Click on User Interface
- Choose “Enable Set Audit Fields upon Record Creation and Update Records with Inactive Owners User Permissions.”
The same tutorial can be applied in Enterprise, Performance, Unlimited and Developer Editions.
Note. After enabling organization-wide permissions, it is necessary to grant the permissions to your Users with custom profiles and other editions as well:
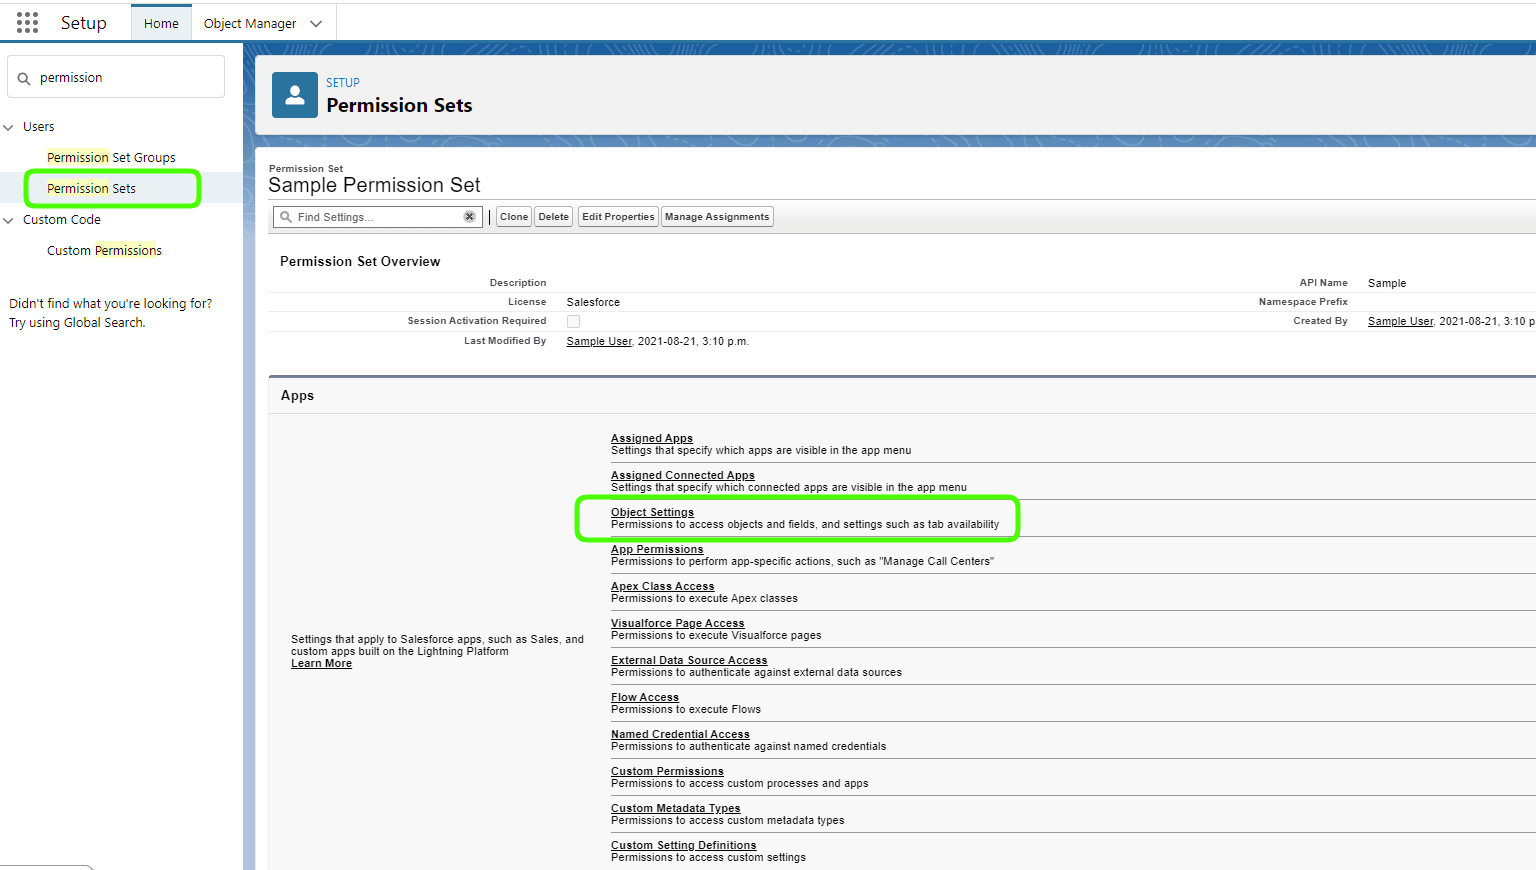
Create a Permission Set In Salesforce Lightning:
- Go to top right corner of the screen and press Setup -> Setup (from drop-down)
- Go to the left and choose Users -> Permission Sets.
- Click New.
- Enter Permission Set information such as ‘Label’ and ‘Description’. Also, you may specify a ‘User license’ (if required)
- Click Save.
- Push System Permissions.
- Click Edit on the next page.
- Find ‘Set Audit Fields upon Record Creation’ and check the box for it. Note: If you do not see this option it’s likely that it is not currently enabled.
- Click Save.
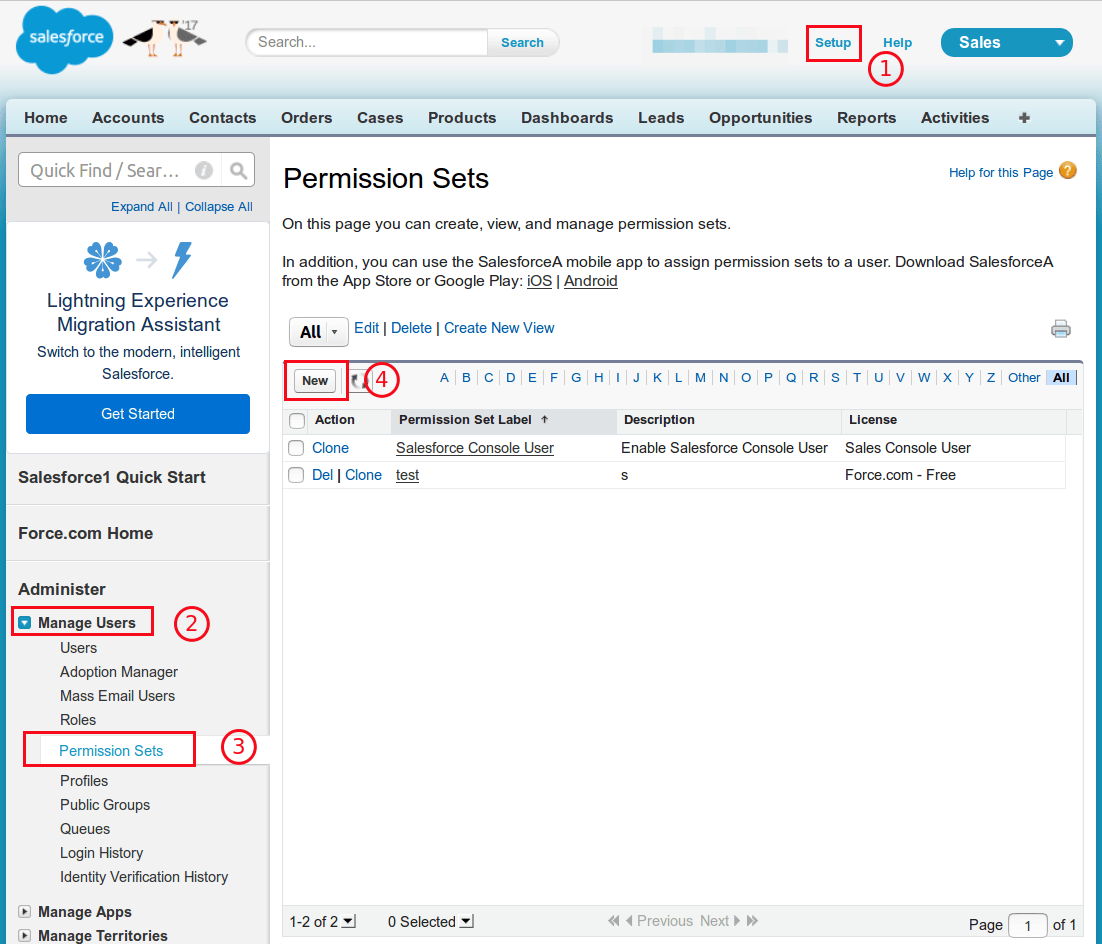
Create a Permission Set In Salesforce Classic:
- Go to top right corner of the screen and press Setup
- Go to the left and choose Manage Users -> Permission Sets.
- Click New.
- Enter Permission Set information such as ‘Label’ and ‘Description’. Also, you may specify a ‘User license’ (if required)
- Click Save.
- Push System Permissions.
- Click Edit on the next page.
- Find ‘Set Audit Fields upon Record Creation’ and check the box for it. Note: If you do not see this option it’s likely that it is not currently enabled.
- Click Save.
Assign the Permission Set In Salesforce Lightning:
- Go to top right corner of the screen and press Setup -> Setup (from drop-down)
- Go to the left and choose Users -> Permission Sets.
- Choose the name of Permission Set and push it
- Click Manage Assignments
- Click Add Assignments
- Select the User/Users to whom you want to assign the ‘Permission Set.’
- Click Assign
- Click Done
Assign the Permission Set In Salesforce Classic:
- Go to top right corner of the screen and press Setup
- Go to the left and choose Manage Users -> Permission Sets
- Choose the name of Permission Set and push it
- Click Manage Assignments
- Click Add Assignments
- Select the User/Users to whom you want to assign the ‘Permission Set.’
- Click Assign
- Click Done